Andy White Anthropology
  • Home
  • Fake Hercules Swords
  • Research Interests
    • Complexity Science
    • Prehistoric Social Networks
    • Eastern Woodlands Prehistory
    • Ancient Giants
  • Blog

The Alt-Right's Cartoon Conceptions of the Human Past: Now Do You Understand Why the Fetishization of "Fringe" Ideas Matters?

1/29/2017

 
I hate to be the "we told you so" guy, but that's what I'm going to be: 

We told you so.

Those of us who have studied the recent resurgence of pseudo-scientific ideas about the human past have been saying for years that this stuff isn't just entertainment. Conceptions about what happened in the past matter deeply to the present, as our orientation toward the world (and particularly its peoples) necessarily depends on an understanding of how the world got to be what it is. We explain the present by reference to the past. That's why getting it right matters. That's why we've developed scientific methods for understanding the past that employ mechanisms to determine if our interpretations are right or wrong.

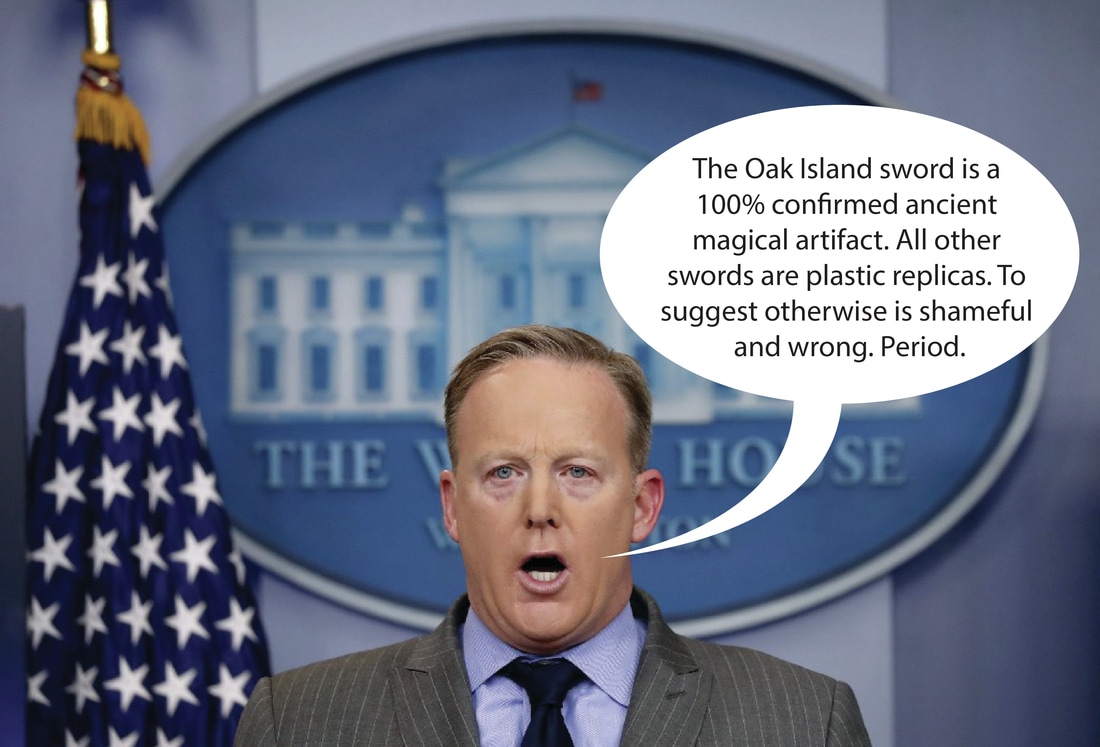
With the Trump administration barely a week old, you're already seeing seeing the effects of disregarding evidence-based reality and crafting federal policy based on ideologies about the human past. So . . . it's "funny" when it's on the History Channel but not so "funny" when it's keeping real humans detained in airports indefinitely.

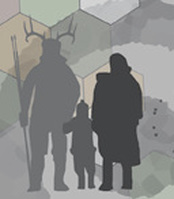
As alarming as it is to see it materialize at the highest levels of our government, the white supremacist ideology that we're now watching surface is nothing new.  It's been around since long before any of us was born -- at least since the age of European exploration and colonialism- -- and has manifest itself in different forms at different times and places. The "white people are naturally the best people" assertion has been a steady constant in pseudo-scientific claims about the human past from the early 1800's right up to the present day. Some of the current proponents of Victorian-age baloney ideas about Atlantis, Aryans, giants, and the pre-Columbian colonization of the Americas by white people are unabashed racists and neo-Nazis.  And now we've elevated them from selling factually inaccurate, heavily plagiarized books on CreateSpace to whispering in the president's ear.

If you want to know what the alt-right thinks about the origins of race and what it has to do with government and economics, listen to this podcast titled "The Origins of the White Man." In it, Richard Spencer (an alt-right figure most famous for leading Trump supporters in a Nazi salute immediately following the election, and, more recently, getting punched in the face twice in one day while celebrating Trump's inauguration) interviews Kevin MacDonald (a retired psychology professor and current editor of the Occidental Observer, a white nationalist publication).
The pair discuss the origins of white people, what makes white people special, and why they think white people need to stick together to protect white people interests. What was most astounding to me was not the factual inaccuracies (there were many) or the ridiculous facade of scholarship manufactured by having a former professor pontificate on a subject he doesn't really understand, but the cartoonish quality of the conclusions of these clowns. It's a ridiculous conversation, only one step removed from attributing the perceived greatness of white people to their special origins in an Aryan Atlantis. Try having a 45-minute conversation with a four-year-old about how electricity works -- maybe that would be a good simulation of what's it like for a professional anthropologist/archaeologist to listen to this nonsense. Unsurprisingly, the origins story that they fetishize isn't original, but resonates with white supremacist mythologies that have been around for a long time (and that constitute the barely-submerged thesis of many "alternative archaeology" programs promoted in places like The History Channel).

One thing I did learn from listening to the interview is that the white supremacist ideology of the alt-right does have a logical connection to their ideas about government, economics, and immigration. If your reaction to the anti-immigrant rhetoric and policies that we're seeing is that "it's all about hate," I will tell that it's more than that. I encourage you to listen to the interview that I linked to above and hear for yourself how the alt-right's ideas about race, society, government, and economics are inter-linked.  Speaking in the context of claims that the success of white European societies can be attributed to their tripartite structure (a merchant class, a warrior class, and "those who pray"), Spencer identifies what he thinks is wrong with the United States (about 25:00 in): ​
"We've lost that . . . maybe that Aryan or warrior component, that type of person who wants to guard the gates, who is willing to confront 'the other," . . . who has a kind of meritocratic as opposed to egalitarian worldview.  We basically have societies that are focused on a kind of spiritualism that says this egalitarian morality that we all embrace, but also gives a tremendous amount of power (far too much, in my opinion) to the bourgeois element -- people who think in terms of buying and selling. Conservatives are really excited about taxes and small business regulation. You know, maybe they're right about all that stuff, but who cares? We've taken the power away from those types of people who naturally want to rule -- that Aryan spirit."
That quote, I think, helps explain why traditional Republican approaches to "pro-business, pro-growth" policies have been relegated to the kids' table while the white supremacists in the Oval Office try to engineer a re-making of government that restores a mythological tripartite balance to our society. They see liberal immigration policy as something deferential to the role of the merchant class and harmful to the cause of producing an ethnically-strong nation. They see in Trump someone who will use flamboyant signature to "guard the gates" and elevate those in the warrior class who are willing to confront "the other."

It's about intolerance, sure, but it's a philosophical, strategic intolerance that goes well beyond some kind of visceral reaction to all non-white people. I think we need to understand that. And I don't think it's irrelevant that the blueprint for society that we're now seeing stamped across our political and economic landscape is drawn directly from claims about the human past that are demonstrably baloney. I winced when Rachel Maddow showed Spencer's post-election speech and kept smirking at his use of the phrase "Children of the Sun."  Neither she nor any other member of the mainstream media caught the deep historical connection to the white supremacist rhetoric of hyperdiffusionism. If you don't know what it is, look it up.  Fringe history is in the White House now, and you should know where the "harmless" ideas come from -- it matters.
Picture
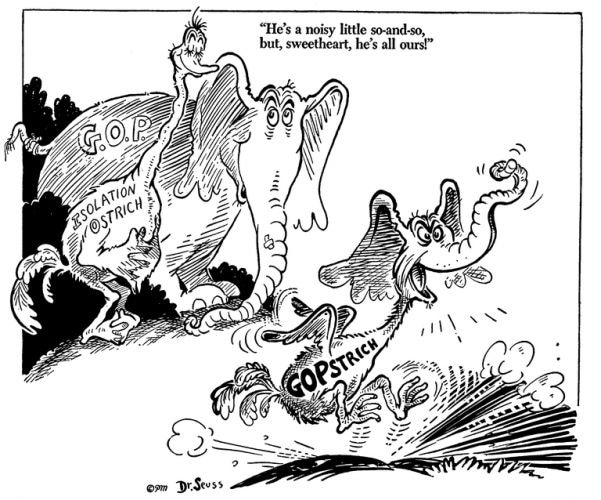
Whatever this new animal is, the GOP owns it. If you think it's going to behave in your interests, you might want to read up on some fake history. World War II-era cartoon courtesy of Dr. Seuss.

The 4-Hour Mockingbird I Made in Just 7.5 Hours

1/28/2017

 
This mockingbird is the smallest sculpture I have welded so far. I started it right after I finished the MiG-15, on a rainy day when I couldn't push my crane and my unfinished stegosaurus outside like I normally do (to make room to maneuver).​
Picture
When I started, I thought I could finish the bird in about 4-5 hours given it's size and relative simplicity. Because my welding and fabrication skills suck, however, it took me nearly 8 hours. I felt myself rushing during that time, which meant that I ended up not getting the wing and tail feathers quite how I wanted them. I like how it turned out, but there are a few things I would change and next time I won't try to rush -- it will just take the time it takes.

Here is a 360 degree video on YouTube:

I don't have many "in progress" shots of this one because I did it in only two sittings. The base is made from part of a coil spring and the perch is the tine from a pitchfork. The bird is made from nails and bolts, steel rod from an oven rack, and sheet metal from a lawn mower (black), filing cabinet (grey), curtain rods (white), and a patio table (white). The shiny piece at the rear end of the bird is the top of the tea kettle lid I used to make the top of the head of Owl #1.

Broad River Archaeological Field School: Day 3 (1/27/2017)

1/27/2017

 
The winter weather here is really unbelievable: for the third straight Friday we had a nice, sunny day in the field (cooler than last week -- mid-50's -- but still great weather to work outdoors).  One downside to the warm winters here is that you can encounter ticks and mosquitoes even in January. That's a fair price to pay, however, for the ability to do archaeology all through the year without employing heroic measures like temporary structures and heaters.

We got lucky with the weather last Friday, as it rained pretty heavily on Saturday and Sunday. So the first thing we had to do this morning was bail out the units. Everyone needs to learn how to bail out units.
Picture
Bailing using the bucket line method. We only had seven square meters open by the end of the day last Friday, so we didn't have much volume to deal with. As this block gets deeper I may look into acquiring a pump. View is from the north edge of the block facing south.
Excavation of the block units continued with completion of the first level, ending at 40 cm below datum (cmbd) in Units 4, 5, and 6. The Unit 5 crew had significantly more roots to deal with, so their Level 1 took longer (they wrapped it up by the end of the day today). In Units 4 and 6, I had them excavate Level 2 (40-50 cmbd) as an arbitrary 10 cm level across the whole 2m x 2m unit simultaneously. The point of having them excavate Level 1 in 1m x 1m quadrants was to give everyone some repetitions taking elevations, excavating, making bags, and filling out forms. I felt like they had grasped the basic methods and procedures after the first level, so it was appropriate to have them try their hands at a 2 x 2. Unit 6 was done with Level 2 by the end of the day; Unit 4 still has a final trim and clean-up to go.
Picture
Excavations in progress in the block. Level 1 nears completion in Unit 5 (to the left); Level 2 in progress in Units 4 and 6.
The second levels in the block units, ending at 50 cmbd, will still end within the upper sediment zone at the site. We now know this is a plowzone, thanks to work going on in the "downstairs" part of the site.

After Jim Legg and one of the students finished up what little remained of Unit 8 first thing in the morning, we used the total station to locate a couple of grid points "upstairs" to establish the E 1000 line. We resectioned off the two permanent (concrete and rebar) datums that I established last May when I started work on the profile. (In survey work, "resectioning" is when you shoot two known points to figure out the location of an unknown point -- where the instrument is set up.  Once the computer in the total station calculates the position and orientation of the instrument with respect to the site grid, you can then shoot additional unknown points. Doing this is often much more convenient then setting up over a known point and shooting to a backsight, as you can set up anywhere as long as you can see two known points.) 
Picture
Total data station (TDS) set up to resection from known points "downstairs" then shoot to locate desired points "upstairs."
We placed spikes at 999 N / 1000 E and 1006 N / 1000 E and laid out Unit 9 as a 1m x 3m unit, the excavation of which would continue the north-south profile line that I started with the excavation of Units 1 and 2.
Picture
Updated unit map showing the location of Unit 9.
With the 1000 E profile line laid out, Jim Legg and his crew could start excavating Unit 9. They started this from both the top and the side, first cutting the walls of the unit from above and then using a shovel and dustpan to come in from the profile wall itself. The strategy was to remove the first sediment zone as a natural level (using the existing profile as a guide), paying particular attention to the interface between the upper zone and what was below it. In the profile, there is a darker zone visible immediately beneath first zone.
Picture
Removal of Level 1 of Unit 9 in progress. The pink string marks the 1000 E line. The black plastic in the foreground is covering the wooden covering I constructed to protect the portion of the profile exposed by the excavation of Units 1 and 2. The goal is to have 5m of profile wall on the same plane (with the exception of some irregularities present in the existing wall).
When Jim and his crew got to the base of the uppermost zone, it was apparent (as we suspected) that it is a plowzone. There are linear plow scars running across the unit. This diagnosis of the uppermost zone as a plowzone is consistent with the mixture of historic and prehistoric artifacts we've been finding in Levels 1 and 2 of the block units. 
Picture
Plow scars visible at interface of Zones 1 and 2 in Unit 9. In this case, the lighter sediment is the plowzone.
Exposing the base of the plowzone in Unit 9 provided a good opportunity to show the students what we're looking for in a transition -- the color change is the reverse of what you normally see, as the sub-plowzone sediment (at least in the profile) is darker than the plowzone. I continue to suspect that there may be an intact Mississippian/Woodland component immediately below the plowzone. We've been getting a fair number of prehistoric sherds in the upper levels of the block units and in the plowzone in Unit 9. Hopefully we'll know more by the end of the day next Friday. Stay tuned!

Broad River Archaeological Field School Website

1/25/2017

 
I've created a website as part of the field school I'm teaching this spring:

www.broadriverarchaeologicalfieldschool.weebly.com

I have two main goals in creating the site, both related to communication between professional archaeologists and the public. 

First, I hope that the website will be a way to communicate a good example how field archaeology in this part of the world is actually done. While there are many non-professionals out there who have a fairly sophisticated understanding of how and why professional archaeologists go about collecting data in the field, there are many others that, I think, have a pretty inaccurate picture in their heads.  Putting time and energy into writing about the field school and explaining what we're doing and why we're doing it that way is part of my ongoing effort to provide a realistic picture of what real archaeology is and how it's done.

Second, I think it's critically important to our future that students learn how to effectively communicate about archaeology with the public. It is my impression that our field has done a generally poor job representing ourselves in ways that are accessible to the general public. Without public support, much of the work we do would not exist, and interest in the preservation and management of cultural heritage resources (such as archaeological sites) would evaporate. It's important that we train the next generation of archaeologists to talk to the public.

For that reason, over the course of the semester each student in the field school will write several blog posts about his/her activities and experiences. I've assigned days to each student, so you should expect to see three new blog posts in the student blog section of the website each week. I hope you enjoy them. 

I plan to add more content (photos, artifact pictures, etc.) as I have time and as things progress. I hope you'll stay tuned and check in to see how things are going as we work our way through the semester.
Picture

Sword 20: The Toronto Yard Sale Sword

1/22/2017

 
Information about Fake Hercules Sword 20 comes to us from Michael Castagne, who reports that he was given the sword around 2007 by a friend who purchased it for $5 at a Toronto yard sale.

I've added the sword (a "J") to the database, estimating some of the basic dimensions from the scaled images.
Picture
Sword 20: front of sword.
Picture
Sword 20: back of sword.
Picture
Sword 20: front of hilt.
Picture
Sword 20: back of hilt.
Picture
Sword 20: detail of Hercules' head and chest.
Picture
Sword 20: detail of side of hilt showing molding seam.
Alert readers will have noticed that I have added slots for Swords 22 and 23 to the database.  Those are going to be interesting. My gut tells me we may be nearing another "tipping point" in the saga of the Fake Hercules Swords.

Oh wait, we're in a new era now so indulge me while I reframe the issue:
Picture

Art Nouveau MiG-15

1/21/2017

 
First flown in service in 1949, the MiG-15 was one of the earliest successful swept-wing aircraft. It is also, in my opinion, a beautifully-proportioned aircraft. So I made one.
Picture
Picture
Because getting the proportions right was important, I started with a blueprint scaled so that I could use section of 3" exhaust pipe for the body. I cut the wings from an old fireplace damper and made the tail surfaces from a metal garden border that I took out of our yard when I made new garden space for my Tyrannosaurus rex. For the tail section of the fuselage I used a tapered section of chrome exhaust from a motorcycle the nose was made from a cup-shaped whatcha-ma-doodle that was attached to the flywheel of a lawnmower.
Picture
This image shows the basic components tacked together. At this point I also have welded onto the wing a curly piece from an old plant stand. I used some of the same curly pieces to build the wings of Owl #1.
Picture
One of the defining characteristics of Art Nouveau is the sinuous line. I liked the way the curly line looked on the wing, so I added some other lines to the body. I tacked out the shapes using some thin steel rod that used to be the ribs of a patio umbrella.
Picture
This shows the filling/grinding of the raised lines/areas in progress. On this side, I tried to create solid areas of shiny steel by filling in with scrap, plugging gaps with the welder, and grinding the surface flat.
Picture
I had some ideas for details to add, but I decided to leave it "as is" after a certain point. I spent a lot of time polishing up details on Owl #1 and the rooster, and it felt right to just leave this one as is. It has the shapes I like and some good contrast, and I'm happy with it. It took me about 10 hours or so -- much of that time spent cutting and grinding with an angle grinder (perhaps one of my least favorite activities).
Picture

Broad River Archaeological Field School: Day 2 (1/20/2017)

1/21/2017

 
After getting our excavation areas cleared and our units set up on Day 1, we were in good shape to start excavating first thing on Friday morning. I gave the students a brief tour of the unit excavation forms we'll be using and explained how redundancies in the information recorded on their forms, in the field specimen (FS) log, on the bags, and in their notes help catch paperwork/provenience errors early in the process. Each student was issued two Sharpies with the challenge of keeping track of them for the duration of the field school.  The first one is free, but replacement Sharpies cost $100/each.

Most of the students worked with me and DuVal Lawrence in the "upstairs" part of the site, excavating the first levels of the units in the 4m x 4m block. Jim Legg and one student worked "downstairs," beginning excavations with the goal of creating a 5m profile wall along the 1000E line. Here is the updated unit map showing the placement of Unit 8 in the "downstairs" portion of the site:
Picture
Unit 8 is a 1m x 2m unit, the east side of which is on the floor of the "downstairs" and the northwest corner of which cuts into the existing vertical wall. Legg established the unit outlines using the two permanent datums that I put in downstairs (designated by the circled x's in the map above). He excavated through the deposits in 20 cm levels, screening the sediments that were removed. The darker zone associated with the presumed Middle/Late Archaic component is clearly visible in the freshly-excavated wall.
Picture
Excavation of Unit 8 in progress (photograph taken facing grid north).
As you can see in the photograph of the Unit 8 excavation, the profile is capped by a sediment zone that contains abundant roots. That zone provided the students with their first "shovels in the ground" excavation experience as we began excavation of three of the units (Units 4, 5, and 6) in the 4m x 4m block that we laid out on Day 1.

I split the students into three groups and gave each group the task of excavating the southeastern 1m x 1m quadrant of their 2m x 2m unit. We went over the basic procedures of getting paperwork set up, labeling bags, double checking coordinates, and taking beginning depths. For the block excavation, we're controlling elevation using a rotating laser level sitting on a concrete block of known elevation (designated Datum 2017A).  Level 1 of Units 4, 5, and 6, will end at 40 cm below datum. I chose that depth to produce a level surface across the block that is still within the upper zone at the site -- these were the first ever levels excavated by these students and it's important to give them some experience with basic unit/level excavation techniques before we get into the intact deposits that (I think) will begin pretty close to the surface.
Picture
First levels in progress in the 4m x 4m block. I anticipate that the greatest technical challenge of this project will be keeping the profile walls intact as the units get deeper. We've laid down plywood on the edge to start providing support, and we'll need to set some guidelines for foot traffic and entry/exit points.
As of now, my plan is to concentrate our efforts on Units 4, 5, and 6 for the time being. With two sides exposed in profile, Unit 3 could then be excavated by natural/cultural sediment zone rather than in arbitrary levels, and could also serve as a "step" to get down into the other units. This would let us avoid putting stress on the southern and eastern sides of the block, preserving those walls for profiling.

In terms of artifacts, the first levels in block yielded low quantities of historic-period debris (a shotgun shell, a couple of pieces of iron, etc.). The first level of the NW 1/4 of Unit 4 did produce a prehistoric body sherd, however, which was a bit of a surprise. Based on the profile revealed in the vertical cut, I didn't expect to encounter prehistoric material until we penetrated what appeared to be a recently-deposited "cap" of lighter-colored sediment. I really don't understand the upper zones of the site yet, so these first levels will be interesting. It's possible that there's a well-preserved Mississippian or Woodland component near the surface, and it's also possible that material from deeper has been brought closer to the surface through natural mechanisms (animal burrows, tree falls, etc.). I hope to be at least starting level 2 in the block units by the end of next Friday. 
Picture
A very poor photograph I snapped of a prehistoric body sherd recovered from level 1 of the NW 1/4 of Unit 4.

My YouTube Channel

1/18/2017

 
Up until now, I haven't utilized YouTube to any great degree. While I'm still not sure that I will, I took a few minutes today to consolidate the few videos that I've previously put online (they were in several different places). This is my channel.  So far all I have on there is a bit of video from an air show, some videos of dragonflies, a snippet from Jim Vieira's visit to my class last semester, and a video of the owl sculpture I just finished. 

I anticipate posting some raw video from my field school this semester, and I'd like to produce some more polished content at some point.  In the meantime, enjoy this video of a slowly rotating scrap metal owl:

Making Owl #1

1/17/2017

 
Yesterday I finished the owl sculpture that I've been working on since the end of December. There a few minor things I would change, but generally I'm pretty happy with it. I originally set out to make a great horned owl at the suggestion of a local resident who was interested in buying it for her garden. After I started working on it, though, I realized I wasn't having a lot of fun trying to anticipate what someone else might or might not like. So I through the "for sale" idea out the window and focused on just having a good time making an owl. Here is how it turned out (here is a video):
Picture
And here is how I made it.
Picture
I originally had it mounted on a piece of bed frame that would fit over a 2 x 4.  My plan was to drill a couple of holes for mounting the frame and then sculpt the toes so it would look like they were grasping the 2 x 4. 

I haven't spent much time looking at owls, so I had to look at a lot of photographs to try to get the body proportions and stance right. I built a basic frame using junk steel rods and other odds and end. The big gear that will become part of the shoulder is from a broken paper shredder that I finally took apart after carting it around for years.
Picture
I made most of the belly feathers with the metal shredding disks that were inside the paper shredder. I started building the wings with some pieces of the frame to an old sled (red). I used other pieces of that sled in my pachycephalosaurus. 

The tail feathers are the handles from butter knives. I learned with the rooster that it works best for me to build birds from the inside out, as feathers are almost always overlapped by other feathers.
Picture
I used the blades of butter knives (obviously) for the feathers at the ends of the wings. I built the shape of the upper part of the wings using some scrolled steel pieces from an old plant stand that I scavenged from my parents' basement (I also used parts of that same plant stand on my pachycephalosaurus and the MiG-15 I'm working on). I used pieces of thin sheet metal (cut from the same rusted platter I used for many of the feathers on the rooster -- I'm going to miss that platter when it's gone) to create some surfaces on the upper wings.
Picture
By this point I had realized two things: (1) the legs were too long; and (2) I was keeping the owl. I cut it off the original base and took the opportunity to work on the belly feathers. This shows the shredder disks all welded in but not "smoothed" by grinding. 
Picture
This shows the body re-mounted on a new base: a perch made from the handle of some kind of steel tool and a cast iron microphone stand that I serendipitously found in the base of our house (left by the previous owners).

I used an angle grinder and a flap disk to touch up the edges of the belly feathers to try to create some contrast and texture.
Picture
A piece of 3" exhaust pipe and a tea kettle lid were about the right size, so I started the head with those.

I started working on the upper belly with some pieces of a rusty appliance frame that I picked up years ago at "Hell's Bridge," Michigan, on a road trip with my daughter.
Picture
SCETV visited my workshop while I was working on the owl. They did an interview for Palmetto Scene, which should air in late January or early February.
Picture
Starting to build the face and head. I used a handle of a trash can, some bike parts, and old scissor handles to start building up the face. I bought some glass eyes because I thought they would look good. They did not and I abandoned the idea.

The first beak (shown here) is made from a piece of a large carabiner. 
Picture
The face and head after a considerable amount of work. I used a bunch of links (cut in half) from a small chain to try to make feathers around the eyes. That was tedious. They were too small to hold in place with my glove on, so I eventually had to resort to using a pair of tweezers (I could not find the needle-nosed pliers). Those got the job done, but not without a lot of dropping and cussing. Not my favorite part of this project.
Picture
Once I finally got the area around the eyes built up and looking like I wanted it, the original beak had drowned. I had to make a larger one that would protrude correctly. I'm getting better at beaks (since the first ones never work right, I've made twice as many beaks as birds). I made this one from some tool hanging hooks -- I welded few together, filled in the gaps with the welder, and ground it down and cut it to fit.
Picture
The completed face.
Picture
From the side.
Picture
From the back.
Picture
From the top.

Is Sword 21 the Earliest Fake Hercules Sword Yet?

1/15/2017

 
This blog post brought to you by insomnia.

A comment by Graham on yesterday's blog post about the newly-discovered Sword 21 raised the possibility that Sword 21, with it's fullered/ribbed "xiphos" blade was a member of the parent generation to the Type F swords (California [Sword 3] and Sonja [Sword 8]):

"Interesting. That design with the full length rib running down the center of the blade looks like the 'fullers' on the California and Sonja blades. Could one of these 'daggers' have been broken in two near the hilt and then used to cast those blades."

I think that's a reasonable working hypothesis.  

One mystery that it would explain is the origin of the partially-fullered blade on the F swords . . . those swords have fullers that begin at the guard but end just a few centimeters down the blade.

The hypothesis that Sword 21 is a representative of a pre-F generation of swords raises several expectations. As I discussed in this post from last January, we can presume that successive generations of swords will be smaller and less detailed.  Loss of both size and detail would have been the expected results of the process of making successive new molds from swords.  If Sword 21 is earlier than Sword 3 (the Type F sword about which we have the most detailed information), we would expect the hilt to be larger and at least as detailed as Sword 3.

Unfortunately, we have only a single photograph of Sword 21. It isn't scaled, so we can't say anything about size. Comparison of the Sword 21 hilt with those of other generations of swords does seem to me to be consistent with the idea that it is early in the copy chain.
Picture
Even with the low resolution of the photo, several features are visible on Sword 21 that are absent from the later swords (e.g., the Type J's and the current Design Toscano version).

  • Log Bumps: The two pronounced bumps visible on the top of the log are important, as the California sword also has them but they are absent in later generations. The J and CS versions have a single pronounced bump; the Design Toscano version has a very muted bump.
  • Lion Paw Digits: The individual digits of the paws of Hercules' lion skin are visible on Sword 21. They're also visible in the California sword. They're less discernible on the J swords; by the time you get to the Design Toscano swords the lion's paws are just blobs.
  • Fullers: As Graham pointed out, if you chop off the blade of Sword 21 near the hilt, you've got a blade segment that appears from the photograph to be more-or-less identical with the fullered blades of the Type F swords. The fullers are lost completely in later generations as the blades become shorter and cruder.

I didn't fully appreciate the possible significance of Sword 21 when I first looked at the image -- I thought maybe it was a bizarre side-branch. But now I think it could be closer to the root. I wish we had some better pictures of the thing. I wonder if it would be worth following up with the auction site to see if they know anything else about the sword (perhaps even who purchased it).

I'm looking forward to seeing what my fellow Swordgate fans think of the idea that Sword 21 gets us closer to the elusive Mother of All Fake Hercules Swords. My plan today is to take the kids to the beach. ​Hopefully you guys can solve the mystery while I'm looking for shark teeth.
<<Previous

    All views expressed in my blog posts are my own. The views of those that comment are their own. That's how it works.

    I reserve the right to take down comments that I deem to be defamatory or harassing. 

    Andy White

    Email me: [email protected]

    Enter your email address:

    Delivered by FeedBurner


    Picture

    Sick of the woo?  Want to help keep honest and open dialogue about pseudo-archaeology on the internet? Please consider contributing to Woo War Two.
    Picture

    Follow updates on posts related to giants on the Modern Mythology of Giants page on Facebook.

    Archives

    May 2024
    January 2024
    January 2023
    January 2022
    November 2021
    September 2021
    August 2021
    March 2021
    June 2020
    April 2020
    March 2020
    January 2020
    December 2019
    November 2019
    October 2019
    September 2019
    May 2019
    April 2019
    January 2019
    December 2018
    November 2018
    October 2018
    September 2018
    August 2018
    July 2018
    June 2018
    May 2018
    April 2018
    March 2018
    February 2018
    January 2018
    December 2017
    November 2017
    October 2017
    September 2017
    August 2017
    July 2017
    June 2017
    May 2017
    April 2017
    March 2017
    February 2017
    January 2017
    December 2016
    November 2016
    October 2016
    September 2016
    August 2016
    July 2016
    June 2016
    May 2016
    April 2016
    March 2016
    February 2016
    January 2016
    December 2015
    November 2015
    October 2015
    September 2015
    August 2015
    July 2015
    June 2015
    May 2015
    April 2015
    March 2015
    February 2015
    January 2015
    December 2014
    November 2014
    September 2014
    August 2014
    June 2014
    May 2014
    April 2014
    March 2014

    Categories

    All
    3D Models
    AAA
    Adena
    Afrocentrism
    Agent Based Modeling
    Agent-based Modeling
    Aircraft
    Alabama
    Aliens
    Ancient Artifact Preservation Society
    Androgynous Fish Gods
    ANTH 227
    ANTH 291
    ANTH 322
    Anthropology History
    Anunnaki
    Appalachia
    Archaeology
    Ardipithecus
    Art
    Atlantis
    Australia
    Australopithecines
    Aviation History
    Bigfoot
    Birds
    Boas
    Book Of Mormon
    Broad River Archaeological Field School
    Bronze Age
    Caribou
    Carolina Bays
    Ceramics
    China
    Clovis
    Complexity
    Copper Culture
    Cotton Mather
    COVID-19
    Creationism
    Croatia
    Crow
    Demography
    Denisovans
    Diffusionism
    DINAA
    Dinosaurs
    Dirt Dance Floor
    Double Rows Of Teeth
    Dragonflies
    Early Archaic
    Early Woodland
    Earthworks
    Eastern Woodlands
    Eastern Woodlands Household Archaeology Data Project
    Education
    Egypt
    Europe
    Evolution
    Ewhadp
    Fake Hercules Swords
    Fetal Head Molding
    Field School
    Film
    Florida
    Forbidden Archaeology
    Forbidden History
    Four Field Anthropology
    Four-field Anthropology
    France
    Genetics
    Genus Homo
    Geology
    Geometry
    Geophysics
    Georgia
    Giants
    Giants Of Olden Times
    Gigantism
    Gigantopithecus
    Graham Hancock
    Grand Valley State
    Great Lakes
    Hollow Earth
    Homo Erectus
    Hunter Gatherers
    Hunter-gatherers
    Illinois
    India
    Indiana
    Indonesia
    Iowa
    Iraq
    Israel
    Jim Vieira
    Jobs
    Kensington Rune Stone
    Kentucky
    Kirk Project
    Late Archaic
    Lemuria
    Lithic Raw Materials
    Lithics
    Lizard Man
    Lomekwi
    Lost Continents
    Mack
    Mammoths
    Mastodons
    Maya
    Megafauna
    Megaliths
    Mesolithic
    Michigan
    Middle Archaic
    Middle Pleistocene
    Middle Woodland
    Midwest
    Minnesota
    Mississippi
    Mississippian
    Missouri
    Modeling
    Morphometric
    Mound Builder Myth
    Mu
    Music
    Nazis
    Neandertals
    Near East
    Nephilim
    Nevada
    New Mexico
    Newspapers
    New York
    North Carolina
    Oahspe
    Oak Island
    Obstetrics
    Ohio
    Ohio Valley
    Oldowan
    Olmec
    Open Data
    Paleoindian
    Paleolithic
    Pilumgate
    Pleistocene
    Pliocene
    Pre Clovis
    Pre-Clovis
    Prehistoric Families
    Pseudo Science
    Pseudo-science
    Radiocarbon
    Reality Check
    Rome
    Russia
    SAA
    Sardinia
    SCIAA
    Science
    Scientific Racism
    Sculpture
    SEAC
    Search For The Lost Giants
    Sexual Dimorphism
    Sitchin
    Social Complexity
    Social Networks
    Solutrean Hypothesis
    South Africa
    South America
    South Carolina
    Southeast
    Stone Holes
    Subsistence
    Swordgate
    Teaching
    Technology
    Teeth
    Television
    Tennessee
    Texas
    Topper
    Travel
    Travel Diaries
    Vaccines
    Washington
    Whatzit
    White Supremacists
    Wisconsin
    Woo War Two
    World War I
    World War II
    Writing
    Younger Dryas

    RSS Feed

    Picture
Proudly powered by Weebly